DIY Pocky Halloween Costume
November 01, 2022

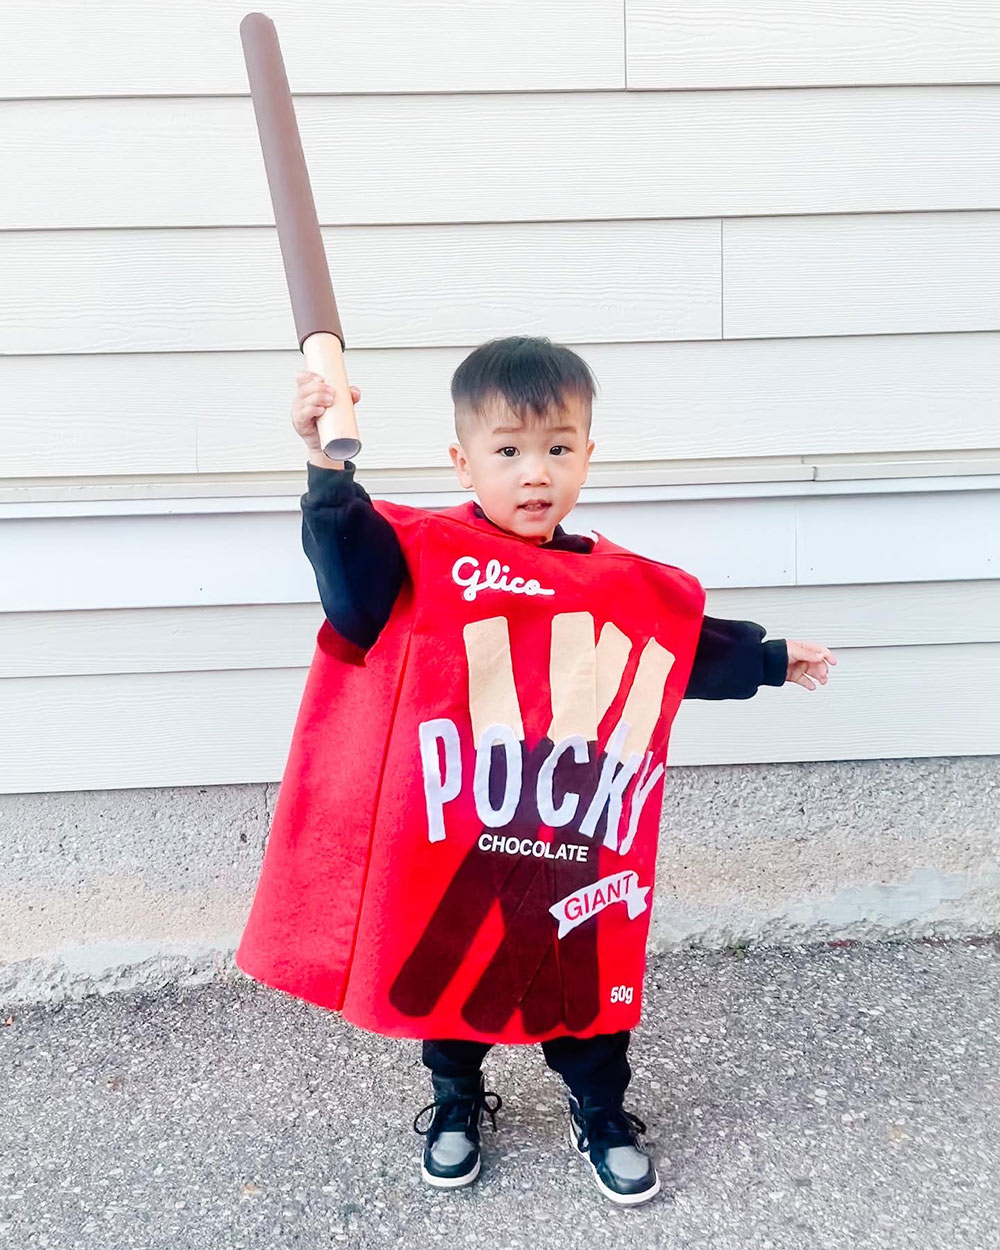
It's Justice's third Halloween! By now I can tell you that I really enjoy making costumes for him (see his sushi and cup noodles costume in the past). This year, I want to continue our Asian food theme and bring one of our favourite snacks to life. May I present to you - our giant Pocky!
In case you didn't know, Pocky is a Japanese brand known for their tasty biscuit sticks originally with chocolate coating. The product line has grown popularity worldwide and has expanded its offering to a wide range of flavours. You can spot one of these goodies in most Asian supermarket.
Not only our whole family loves snacking on Pocky sticks on a daily basis, its iconic, eye catching red packaging is so memorable and easy to replicate. Here's what I did and my thought process in case you want to turn your baby into a snack too!
I used felt for this costume as I want Justice to be able to move freely in it. I want a material that can be folded and stored away easily after use. Felt is thick and stiff enough to hold its shape, does not fray like other fabrics and allows me to glue things on it. I purchased a large piece of felt from my local fabric store along with some felt sheets in beige, brown and white colour. You can also make this out of cardboard box if you don't mind the bulkiness.
Get my Pocky Design Cut File HereNot only our whole family loves snacking on Pocky sticks on a daily basis, its iconic, eye catching red packaging is so memorable and easy to replicate. Here's what I did and my thought process in case you want to turn your baby into a snack too!
I used felt for this costume as I want Justice to be able to move freely in it. I want a material that can be folded and stored away easily after use. Felt is thick and stiff enough to hold its shape, does not fray like other fabrics and allows me to glue things on it. I purchased a large piece of felt from my local fabric store along with some felt sheets in beige, brown and white colour. You can also make this out of cardboard box if you don't mind the bulkiness.
DIY Pocky Sticks Halloween Costume
Materials for Pocky Costume:
- Felt (red, white, beige and brown)
- White glue
- Bonding tape (optional)
- Fabric cutter or scissors
- Cricut or other cutting machine
- White iron-on vinyl
- My Pocky design cut file
Materials for Giant Pocky Stick:
- Cardboard tubes or paper towel tubes
- Brown / beige paint
- Paint brush
- Kraft wrapping paper (optional)
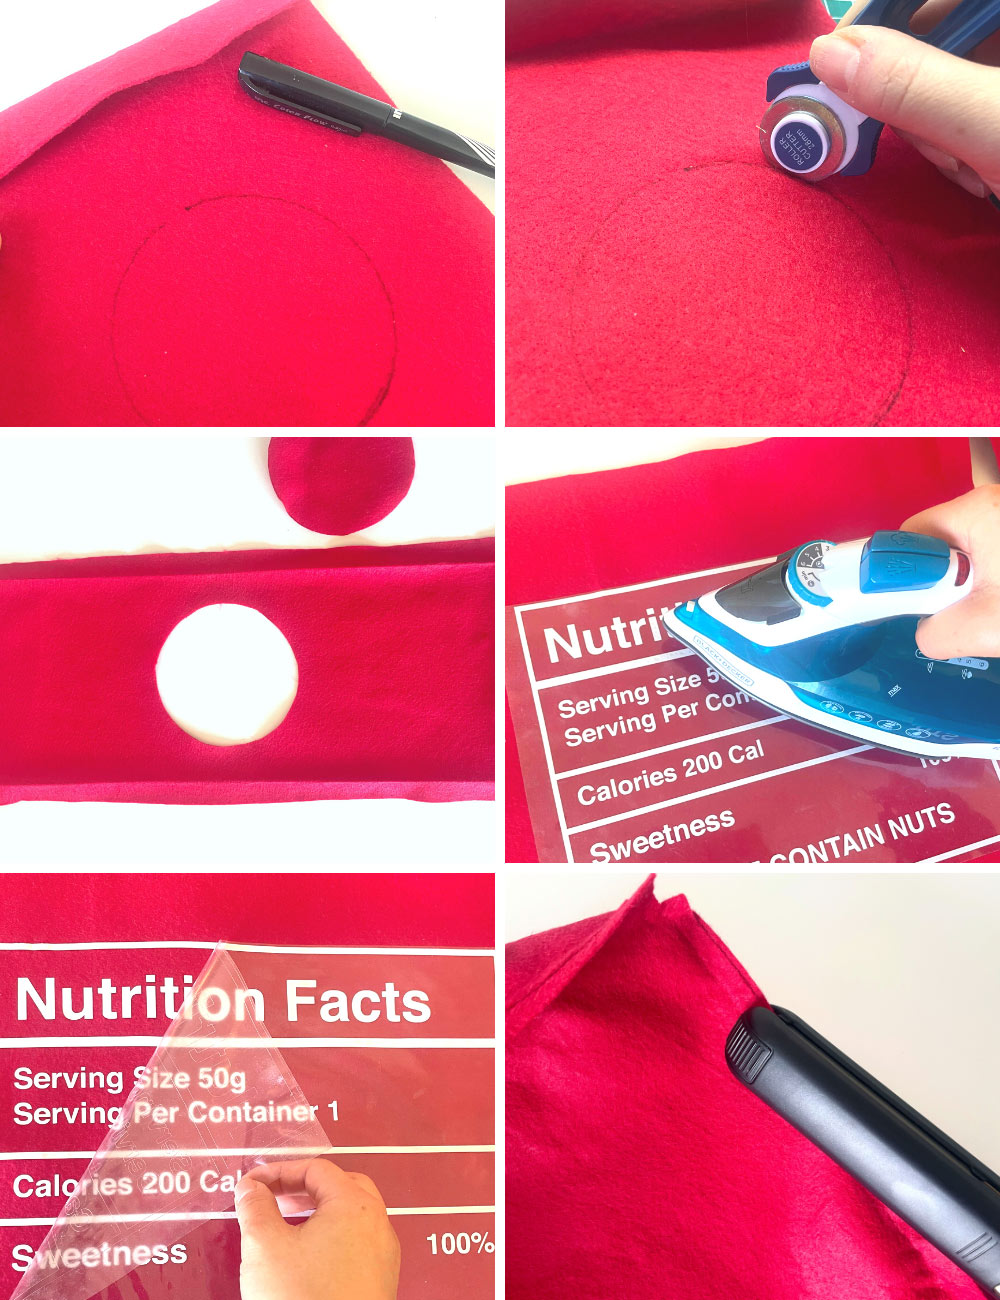
Justice is about 3 feet tall and I wanted the costume to be down to his knees, about 21 inches in length and 16 inches wide. The staff from the fabric store was very helpful in determining how much felt I'd need (since I suck at math!). So, to help you determine all the pieces you'd need, here's a diagram. You can adjust the size to fit your own needs. I also added about half an inch on all sides for seam allowance to attach the pieces together. For the head and arm holes, I traced an outline using a 4" wood circle on the side panels and cut all the pieces out with a fabric cutter.

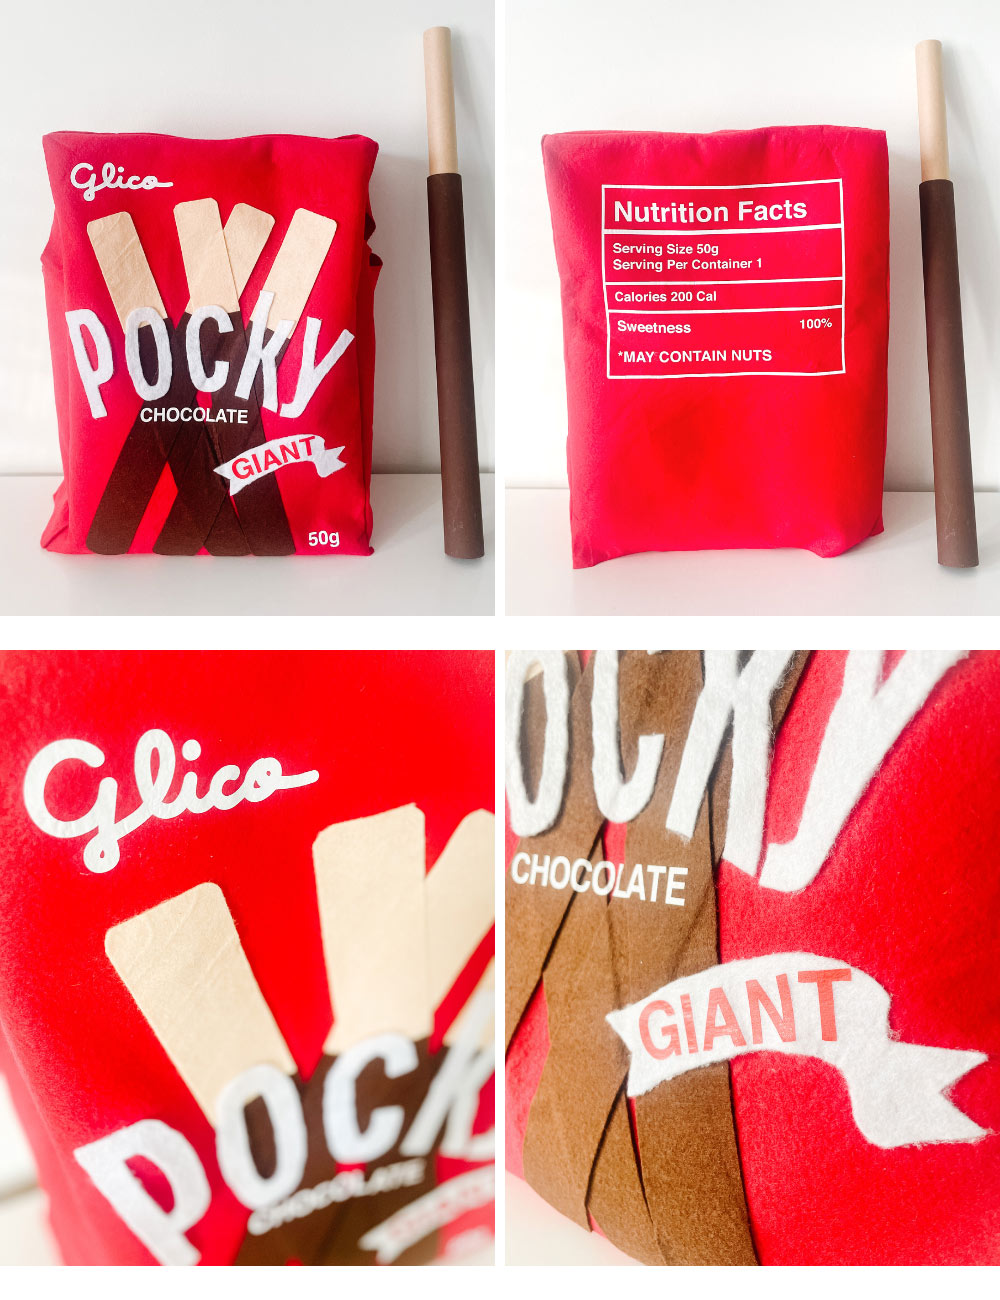
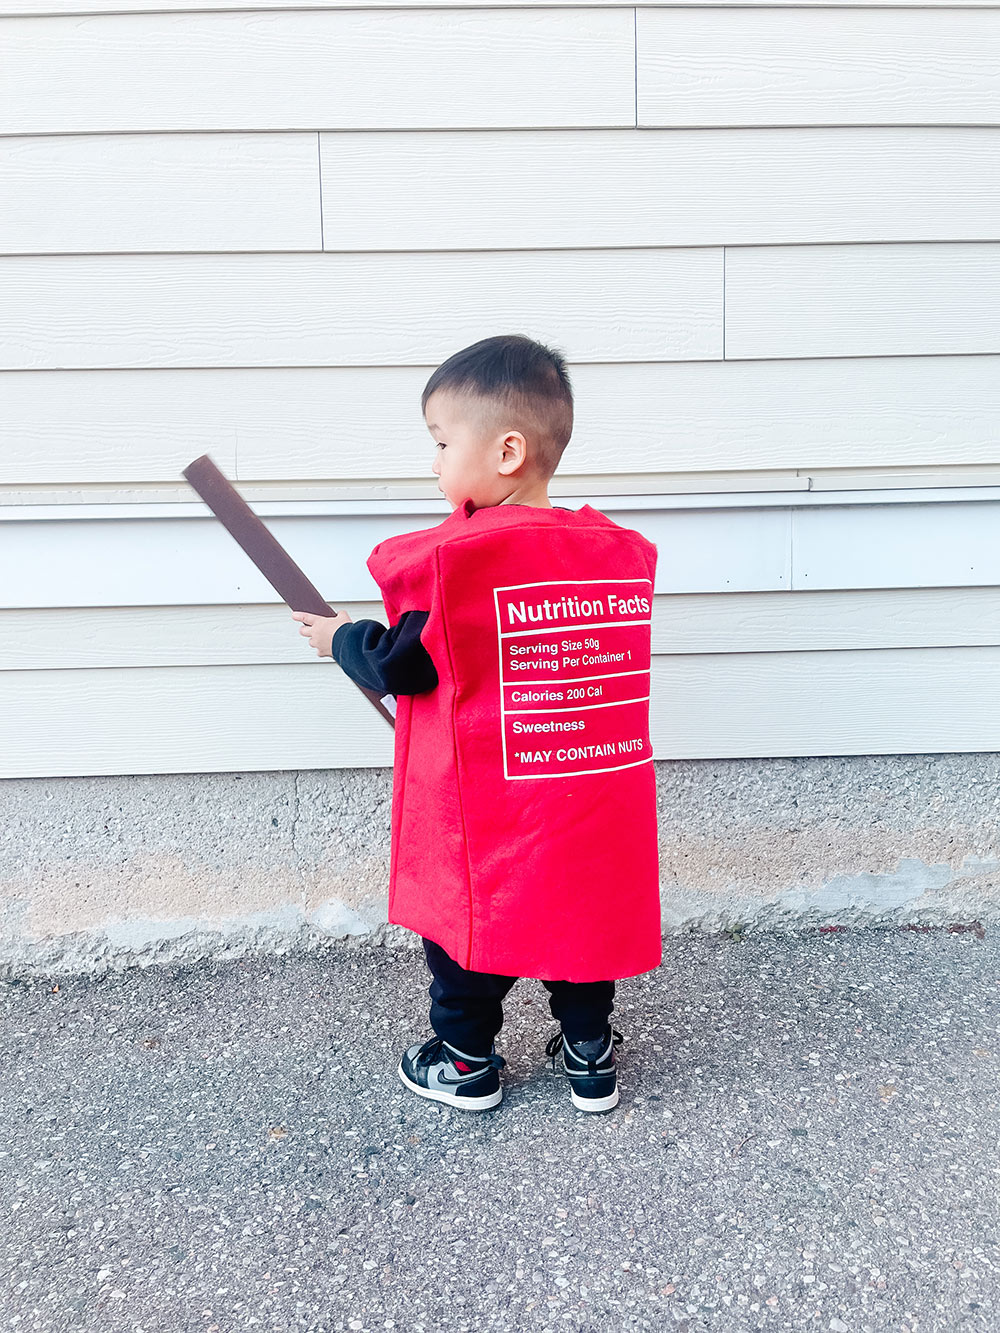
With my mighty Cricut machine, I cut out the logos and nutrition facts onto white iron-on vinyls. Then, pressed the designs onto the front and back red panels with my good ol' iron. After my front and back panel designs were finished, I cut holes for the arms and head in my side panels before finally attaching all the side seams together.
This part was a bit tricky. I find it easier to tell which pieces should attach together when I laid out all the connecting pieces in order on the floor. I put some bonding tape (or you can use white glue) and sandwiched between two connecting side seams. Then I used my hair straightener (yes, you read that right!) and pressed them together. The pressing and heat will turn the bonding tape into some kind of adhesive and bond the two felts together. I love using my hair straightener like a mini heat press. It's so helpful to apply heat to areas as narrow as the side seams! I also bonded the seams from the inside, with wrong side of the panels facing out. So, when I flipped the costume inside out, the seams are clean and hidden.
Finally, to make the costume fall straight down his body and not crunched up (since it's quite oversized on him), I cut two pieces of cardboard in the same widths as my top panel, added velcro adhesive to them and inserted them like shoulder pads. The velcros help secured the cardboards to the felt.


To make the giant Pocky stick, I used cardboard tubes that came with my vinyl rolls and wrapping paper. I used 2 rolls of different circumference to mimic how the chocolate coating is slightly thicker than the biscuit stick. I wrapped the thinner tube with a beige colour kraft paper and painted the wider tube with brown acrylic paint. Inserted the pieces together and filled the gaps with leftover brown felt. No glues was needed as the felt actually hug the wider roll perfectly, which ended up making the pocky stick extractable!
Hope everyone had a great time trick or treating!
What did you or your children dressed up as?
If you give this a try, be sure to share your pictures with me on IG @tingandthings_ or use hashtag #diywithting. I'd love to see your version!

![About [span]me[/span]](https://blogger.googleusercontent.com/img/b/R29vZ2xl/AVvXsEg51YZA3uff_lGfAm2WPvaPtznUF0gsieSuVaBa_d4ueEQHmGAHJoO-6IjG2QhrHsB6TFxtBe7Kp7pgPhQ9JxDPFeWf9zlhWBpmioDCq_cgwCmfvXsb3Q935VBe0Bg1yrOJFakkvZK6XQ/s1600/profile7.png)


![About [span]me[/span]](https://blogger.googleusercontent.com/img/b/R29vZ2xl/AVvXsEi0M_3kH8dItlAXTuIsv2fy6Vh66DmueOkq-Xb31dyGKOzuemaVtbrM_2rVWoIm3NFdwlpPEnezCBHeO6vHRn-aPne1M7U9EI4PUTUT6f0IyYR43irzt8-u23HGLtfqpBdheA-g6LhyQA/s608-Ic42/profile5.png)
0 comments
I'd love to hear your thoughts and comments! Come back soon :)